Managing users and roles
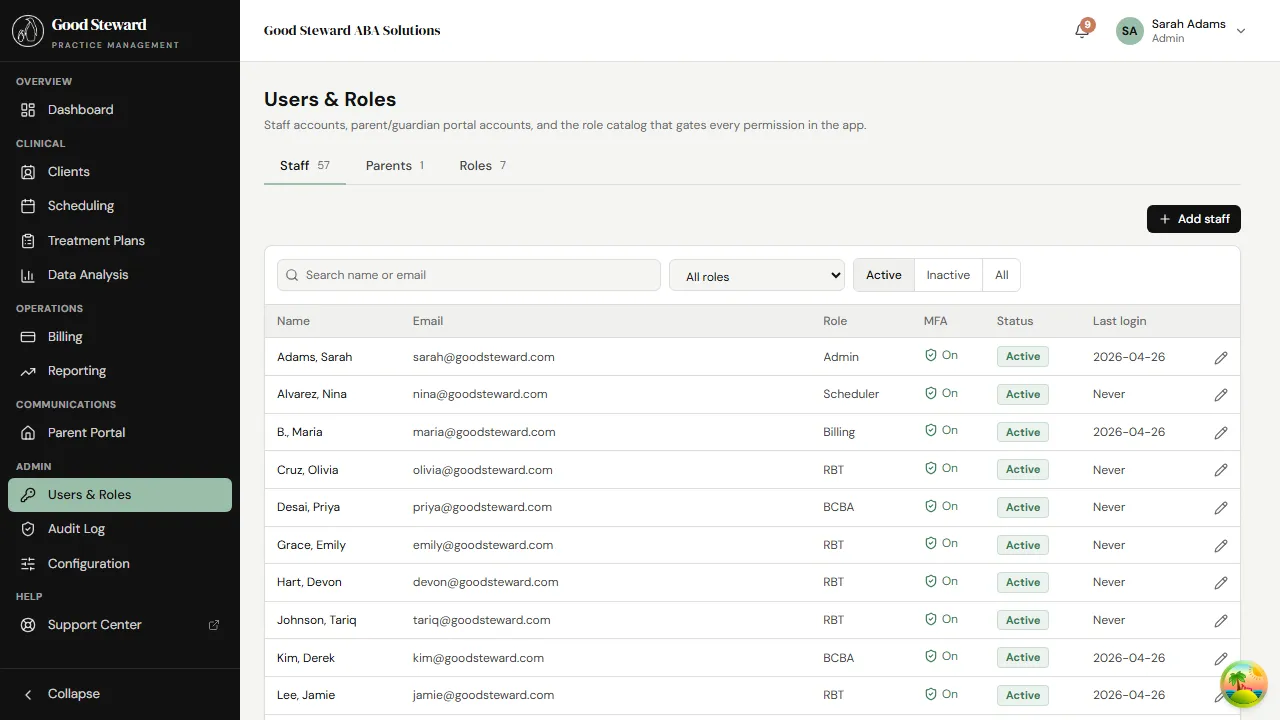
The Users & Roles page is where you onboard staff and parents, assign permissions, and handle deactivations. Open it from the sidebar (Admin → Users & Roles).
The three tabs
Section titled “The three tabs”- Staff — every active or inactive staff user (BCBA, RBT, admin, billing, scheduler).
- Parents — every parent / guardian account. Each parent is linked to one client; adding a second linked client requires a separate parent record.
- Roles — the catalog of roles in the practice and the permission grid that backs them.
Staff vs. parents — same auth, different surface
Section titled “Staff vs. parents — same auth, different surface”Both staff and parent accounts live in the same users table on the
back end. Same login form, same MFA path, same audit story. The split
into two tabs is a presentation thing — the Parents tab adds
client-link controls and contact-info fields the Staff tab doesn’t
need.
1. Inviting a new staff member
Section titled “1. Inviting a new staff member”From the Staff tab click Invite staff. The dialog asks for:
- First / Last name and email — basic identity.
- Role — which role this user gets. The list is the practice’s role catalog (see the Roles tab).
- Optional fields — NPI (for clinicians who’ll appear on claims), taxonomy code, BACB cert info (for BCBAs), availability pattern.
Submit and the staff member receives an invitation email with a one-time link to set their password. They land on a forced-MFA enrollment screen on first sign-in (if MFA is enforced practice-wide).
A pending invitation appears in the Staff list with status Pending invitation; once the user finishes setup it flips to Active.
2. Inviting a parent
Section titled “2. Inviting a parent”From the Parents tab click Invite parent and pick the client to link. The form prefills name and email from the client’s demographics tab. The same email-driven flow as staff — one-time link, set password, MFA. The parent lands on the portal-only routes (no clinical UI is reachable from a parent account).
If a parent is the guardian of multiple siblings, create a parent record per child. The system enforces one-client-per-parent today; multi-child portal access is on the roadmap.
3. Roles vs. role types
Section titled “3. Roles vs. role types”This trips people up — there are two layers:
- Role type — Admin, BCBA, RBT, Billing, Scheduler, Parent. These are stable identifiers the application uses for routing decisions (“BCBAs see all clients”, “RBTs see only assigned clients”, “parents see the portal”).
- Role — the practice’s named, customizable wrapper around a
permission set. A role’s
roleTypeis what the app reads for routing; the practice can rename or duplicate a role freely without breaking anything.
Most practices keep one role per role type at first (e.g. a single
“BCBA” role with a default permission set). You only need multiple
roles per role type when you want to grant different permissions to
different subsets of, say, BCBAs — for example a BCBA-Lead role
with manage_settings and a regular BCBA role without it.
4. Building or editing a role
Section titled “4. Building or editing a role”The Roles tab lists every role with its role type and the count of users assigned. Click a role to edit it.
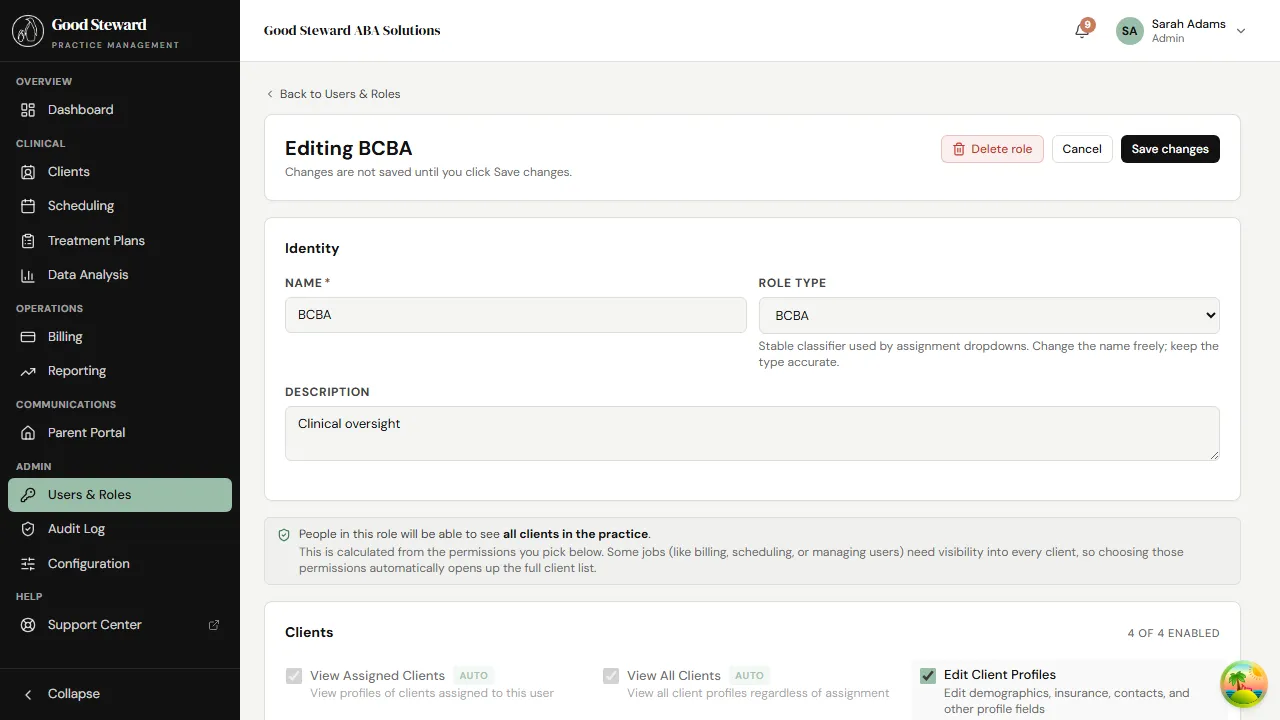
The editor has two parts:
- Basics — name, role type, color (for the badge), description.
- Permissions — a checkbox grid grouped by feature area (Clients, Sessions, Treatment Plans, Billing, Reports, etc.).
A few permissions are forced by role type (e.g. parents always
have view_portal; admins always have manage_users) — these
appear locked. Everything else is up to you.
Two important client-scoping permissions
Section titled “Two important client-scoping permissions”view_assigned_clients— user only sees clients they’re explicitly assigned to. The default for RBTs.view_all_clients— user sees every client in the practice. The default for BCBAs and admins.
These are mutually exclusive in practice — granting both is the same as granting view_all. The role editor warns when the combination makes no sense.
5. Assigning a role to a user
Section titled “5. Assigning a role to a user”From the user’s row in Staff or Parents, click the pencil icon to edit. Change Role in the form and save. The change takes effect immediately, but does not log out the user — they pick up the new permissions on their next page navigation.
If a permission downgrade is sensitive (revoking finalize_notes from someone in the middle of a review session, for instance), bump their token version to force a re-login. There’s a button on the user edit form for that.
6. Deactivating a user
Section titled “6. Deactivating a user”Set the user’s status to Inactive. What happens:
- Their account becomes unable to log in. Existing tokens are invalidated.
- Their assigned sessions stay assigned (history is preserved). Open scheduled sessions need a new staff assignment — the deactivation flow prompts you with options for handling them.
- Their already-finalized notes and signatures stay intact and attributable to them.
- They can be reactivated at any time without losing history.
Hard-deletion of users is not a normal operation in this app — HIPAA wants user identity preserved on audit rows for 6 years. If a user truly needs to be removed (rare — a duplicate account, a mistaken invitation), contact support.
7. Resetting a user’s password or MFA
Section titled “7. Resetting a user’s password or MFA”From the user’s edit form:
- Send password reset — emails a reset link. The user picks a new password the same way as a forgotten-password flow.
- Reset MFA — clears the user’s MFA secret and forces them to enroll a new authenticator app on next login. Use this for lost phones or compromised authenticator apps.
Both actions write an audit row with you as the actor.
8. Inviting parents in bulk
Section titled “8. Inviting parents in bulk”There isn’t a bulk invite UI today. For practices migrating in,
import the client records with parent_email set on each, then go
through the Parents tab and click Invite per row. The roadmap
has a bulk-invite option scheduled.